Set up the PoE Add-on board
The Coral PoE Add-on Board provides wired connectivity and power for the Coral Dev Board Micro. It adds an RJ45 Ethernet jack that can provide power to the main board. This page shows how to connect the boards and start developing with Ethernet.
For technical details, see the Coral PoE Add-on datasheet.
Connect the boards together
Carefully press the boards together as follows:
-
Orient the boards to align the board-to-board connectors and mounting holes. (The PoE Add-on uses just one board-to-board connector, so the other connector pad is unpopulated.)
Caution: Do not to press on the camera lens or you might damage the sensor. -
Pinch the boards together using a flat part of the board near the connectors (it's okay to press on the mounted chips).
You should hear a firm click.
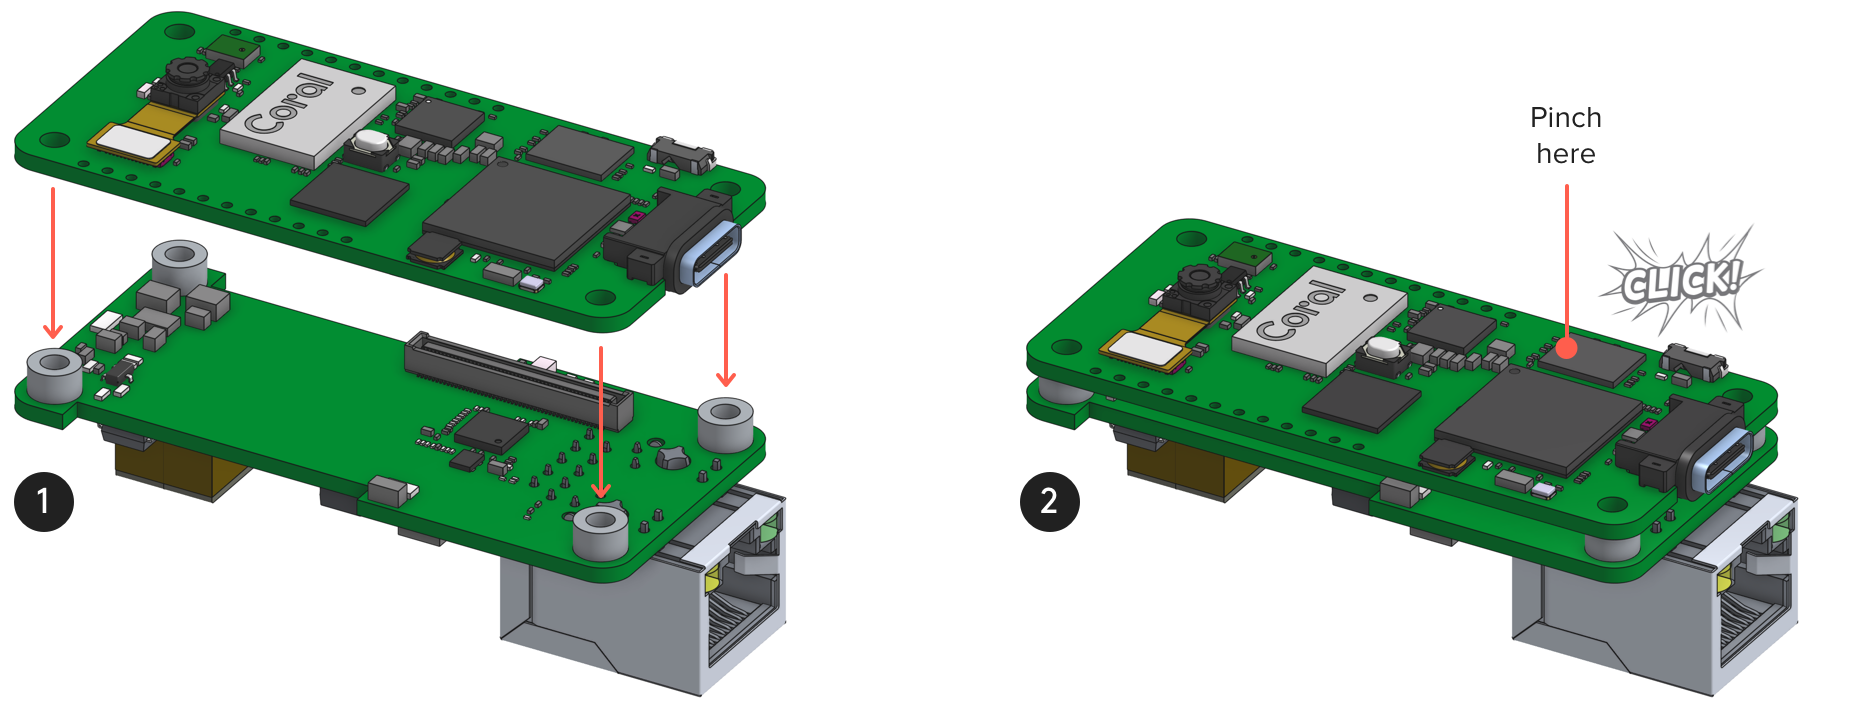
When viewed from the side, the boards should be perfectly aligned and the four standoffs should be touching the main board.
To remove the PoE Add-on board, separate the boards at the short side with the Ethernet jack. Do not peel them apart from the long sides (where the header pins reside) or you risk detatching the connector.
Power the board over Ethernet
As long as your Ethernet cable is connected to a switch capable of Power-over-Ethernet, just plug the Ethernet cable into the PoE Add-on board and it will power the whole system.
Connect to an Ethernet network
To get online with Ethernet, include coralmicro/libs/base/ethernet.h and then
call coralmicro::EthernetInit().
That's it.
For example, try the curl code example using Ethernet as follows
(run this from the coralmicro repo root):
bash build.sh

python3 scripts/flashtool.py -e curl --subapp curl_ethernet
You should see output in the serial console like this:
Attempting to use ethernet...
Failed to read ethernet speed, assuming 100M.
Initializing PHY...
DHCP succeeded, our IP is 192.168.86.54.
www.example.com -> 93.184.216.34
Curling http://www.example.com:80/
Curling of http://www.example.com:80/ successful! (1256 bytes curled)
Done.
Is this content helpful?